BMPCC4k/6k - Arri Gamut
So, a few months ago we had a shoot that required us to get some mounted driving shots, The BMPCC4k seemed like the right camera for the job. Problem is we were also shooting with the Arri Amira as our main cam so I needed to make sure they matched fairly well.
After recording quiet a bit of test footage on the BMPCC4k I found the “Blackmagic look” feeling kind or orange/brown compared to the Arri footage. I also noticed the curves didn’t quiet match.
Because of this I decided to see if I could make a conversion LUT for the “Blackmagic Film” log to bring it closer to the Arri rec 709 range. I can’t for the life of me find the images I used to create the lut, I’ll keep looking, but essentially I was able to get pretty darn close. I had a light in the frame “blowing out” the wall on the right, color checker in the center, and dark shadows on the left of frame created from the light. Both cameras had the same lens, position, ISO, and aperture during the reference to avoid any unknown variables.
Obviously the Arri has more dynamic range so there’s going to be a disconnect eventually, but if the scenes lit decently it should match pretty well.
I also made sure that their was no shift in color or gamma when switching between white balances and iso’s. I’m pretty satisfied with the outcome.
This LUT also works perfectly with the BMPCC6k


Quasar Retrofit
I’ve heard a few people asking about how people are fitting 6 quasar tubes into 4 bank kino housings and thought I would to a quick walk-through of the process.

I’ve heard a few people asking about how to fit 6 quasar tubes into 4 bank Kino housings and thought I would do a quick walk-through of the process. First, I’ll go over what you need since I’m fairly certain you guys already know the benefit of getting more, better, and brighter lights into Kino fixtures.
In this walk-through, I’m going to be using a 4’ 2Bank and putting (3) 4’ Quasar tubes into it. If you’re looking to go the 4Bank-to-6Bank route, just add to some of the materials. Also as a note this wont work with the T8 bulbs until they release Q-Blocks for them.
You’re going to need:
Q-Block T12 (6 for a 2Bank, 12 for a 4Bank retrofit)
Machine Screws #10-32 x ¾ in (2 per Q-Block)
Washers and hex nuts
Quasar Tubes
Optional:
18-2 Lamp wire

Once that all arrives, you’re going to want to grab your Kino housing and Dremel off the standard Kino clips, probably the most painful step, ha.
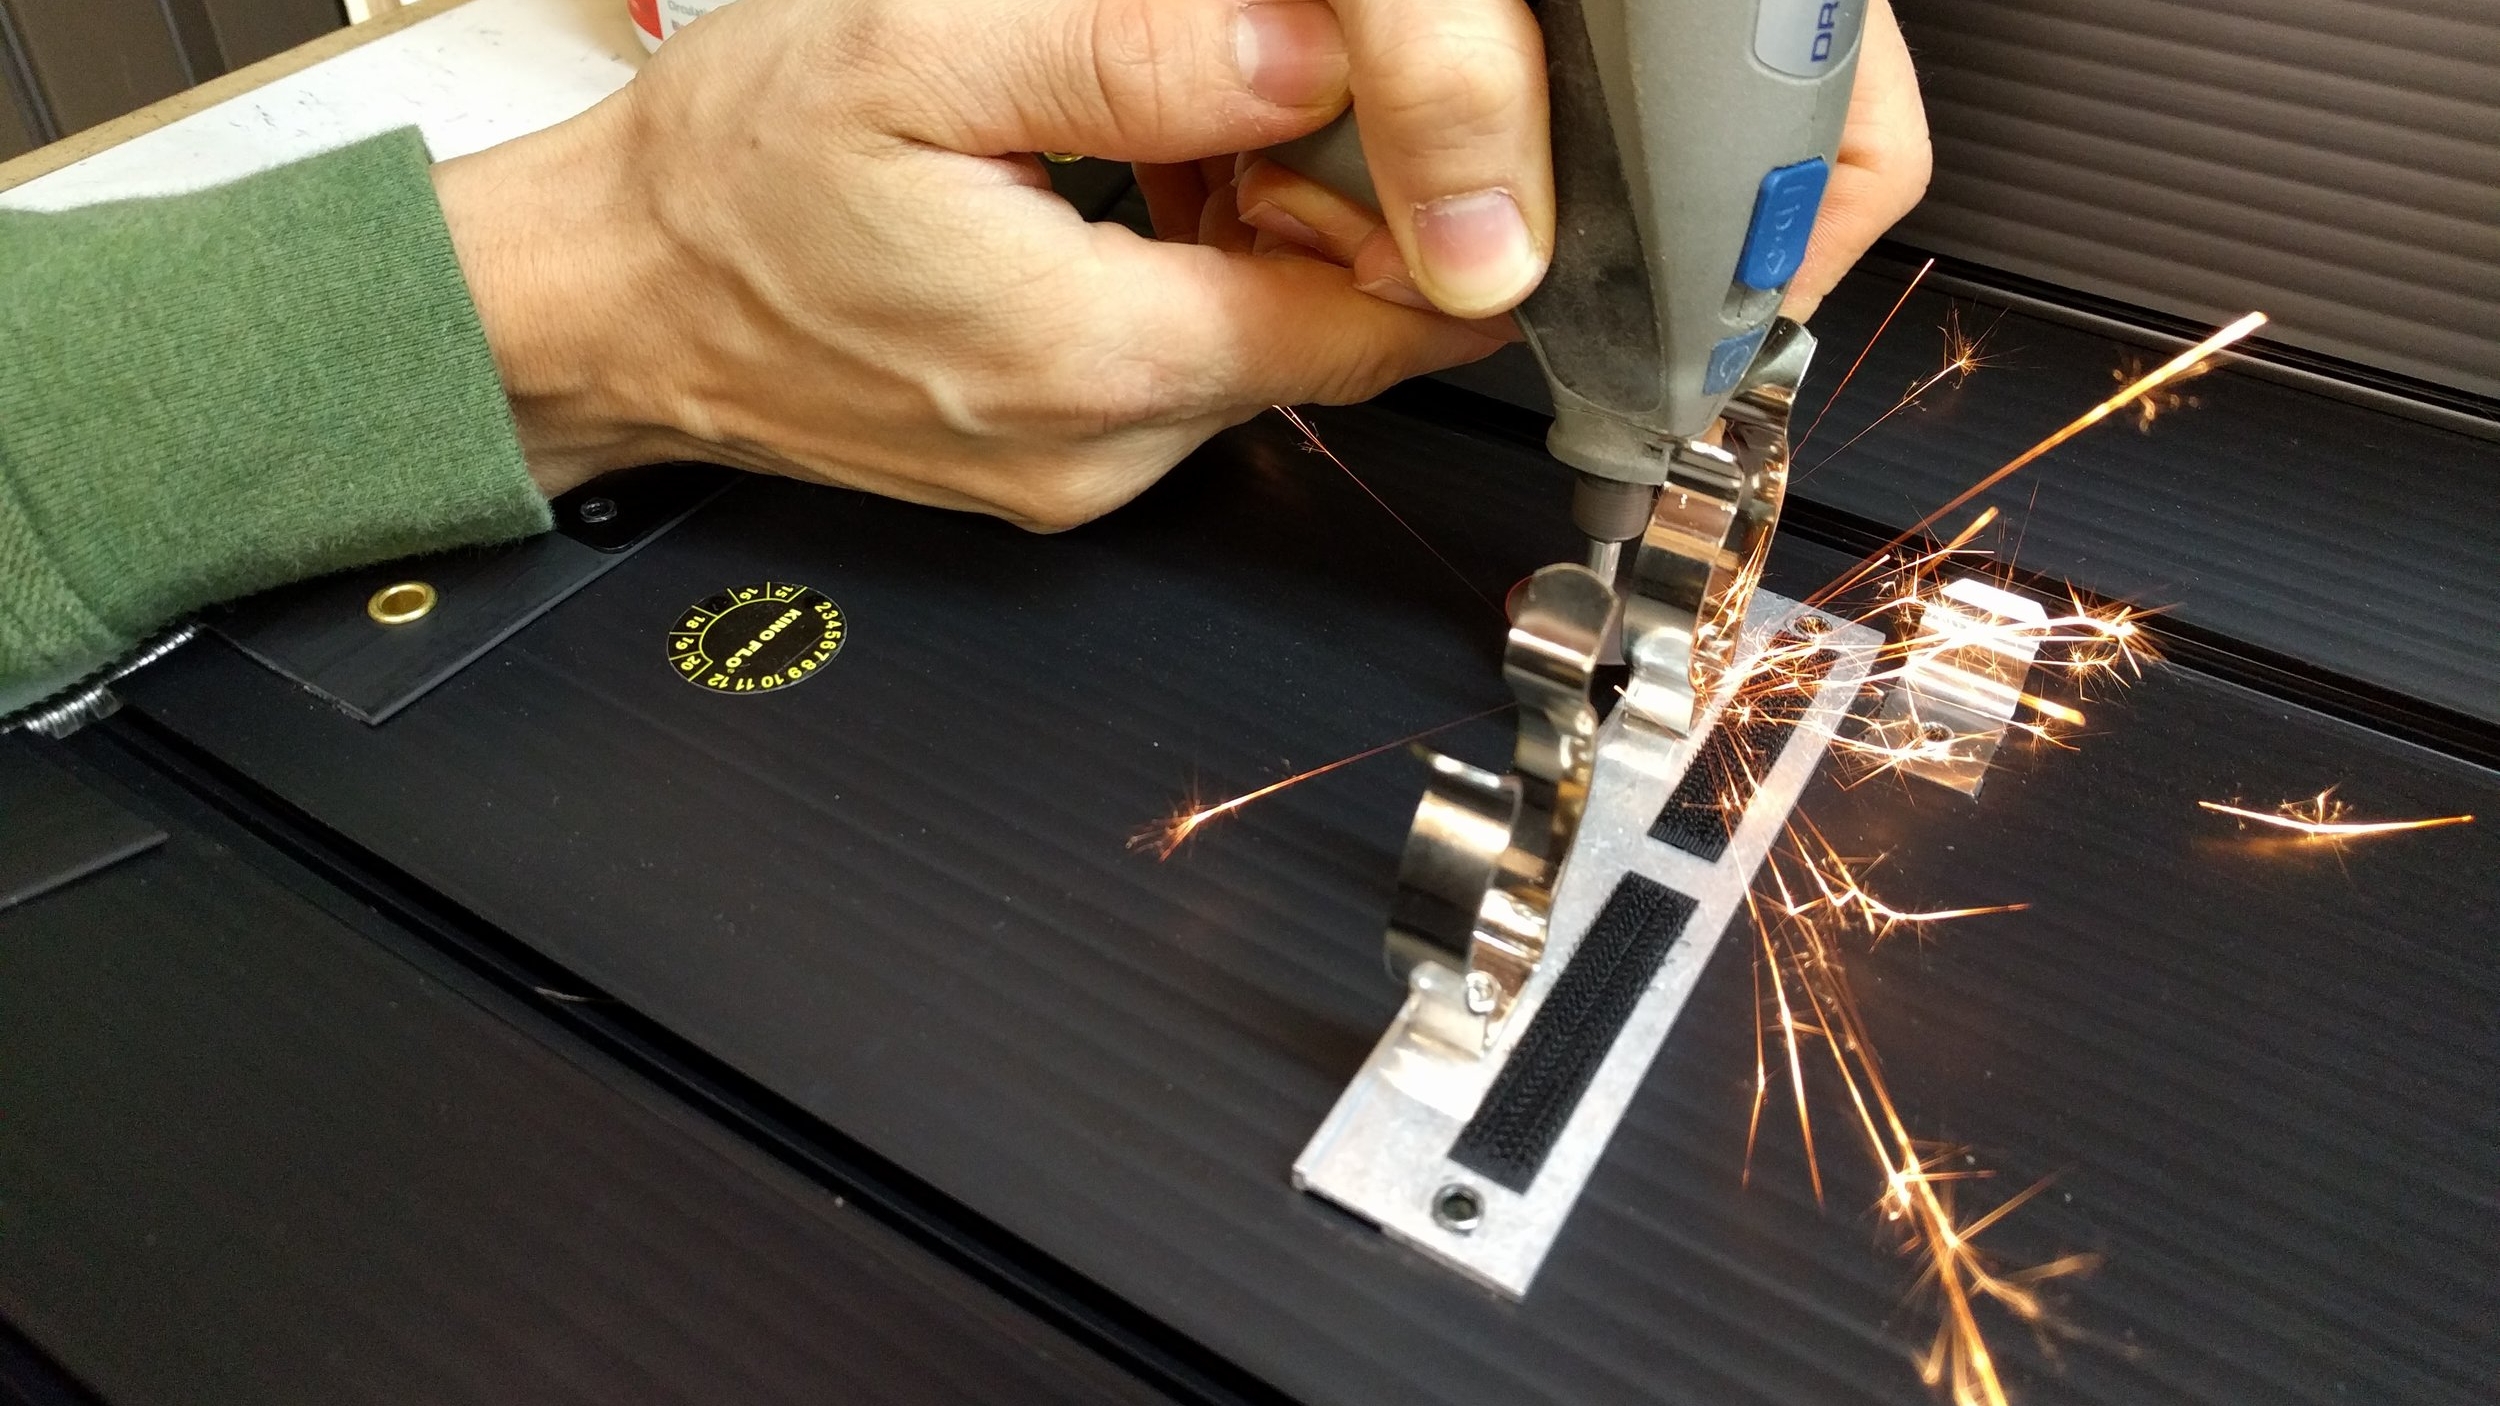
Once the clips have been taken off, you will need to figure out the ideal spot for mounting the Q-Blocks onto the housing. Put the Q-Blocks onto the fixture and try inserting some of the Quasar tubes so that they line up from one end to the next. For me, I placed them right next to the metal where the old clips were and that gave me a straight line to work from on both side.
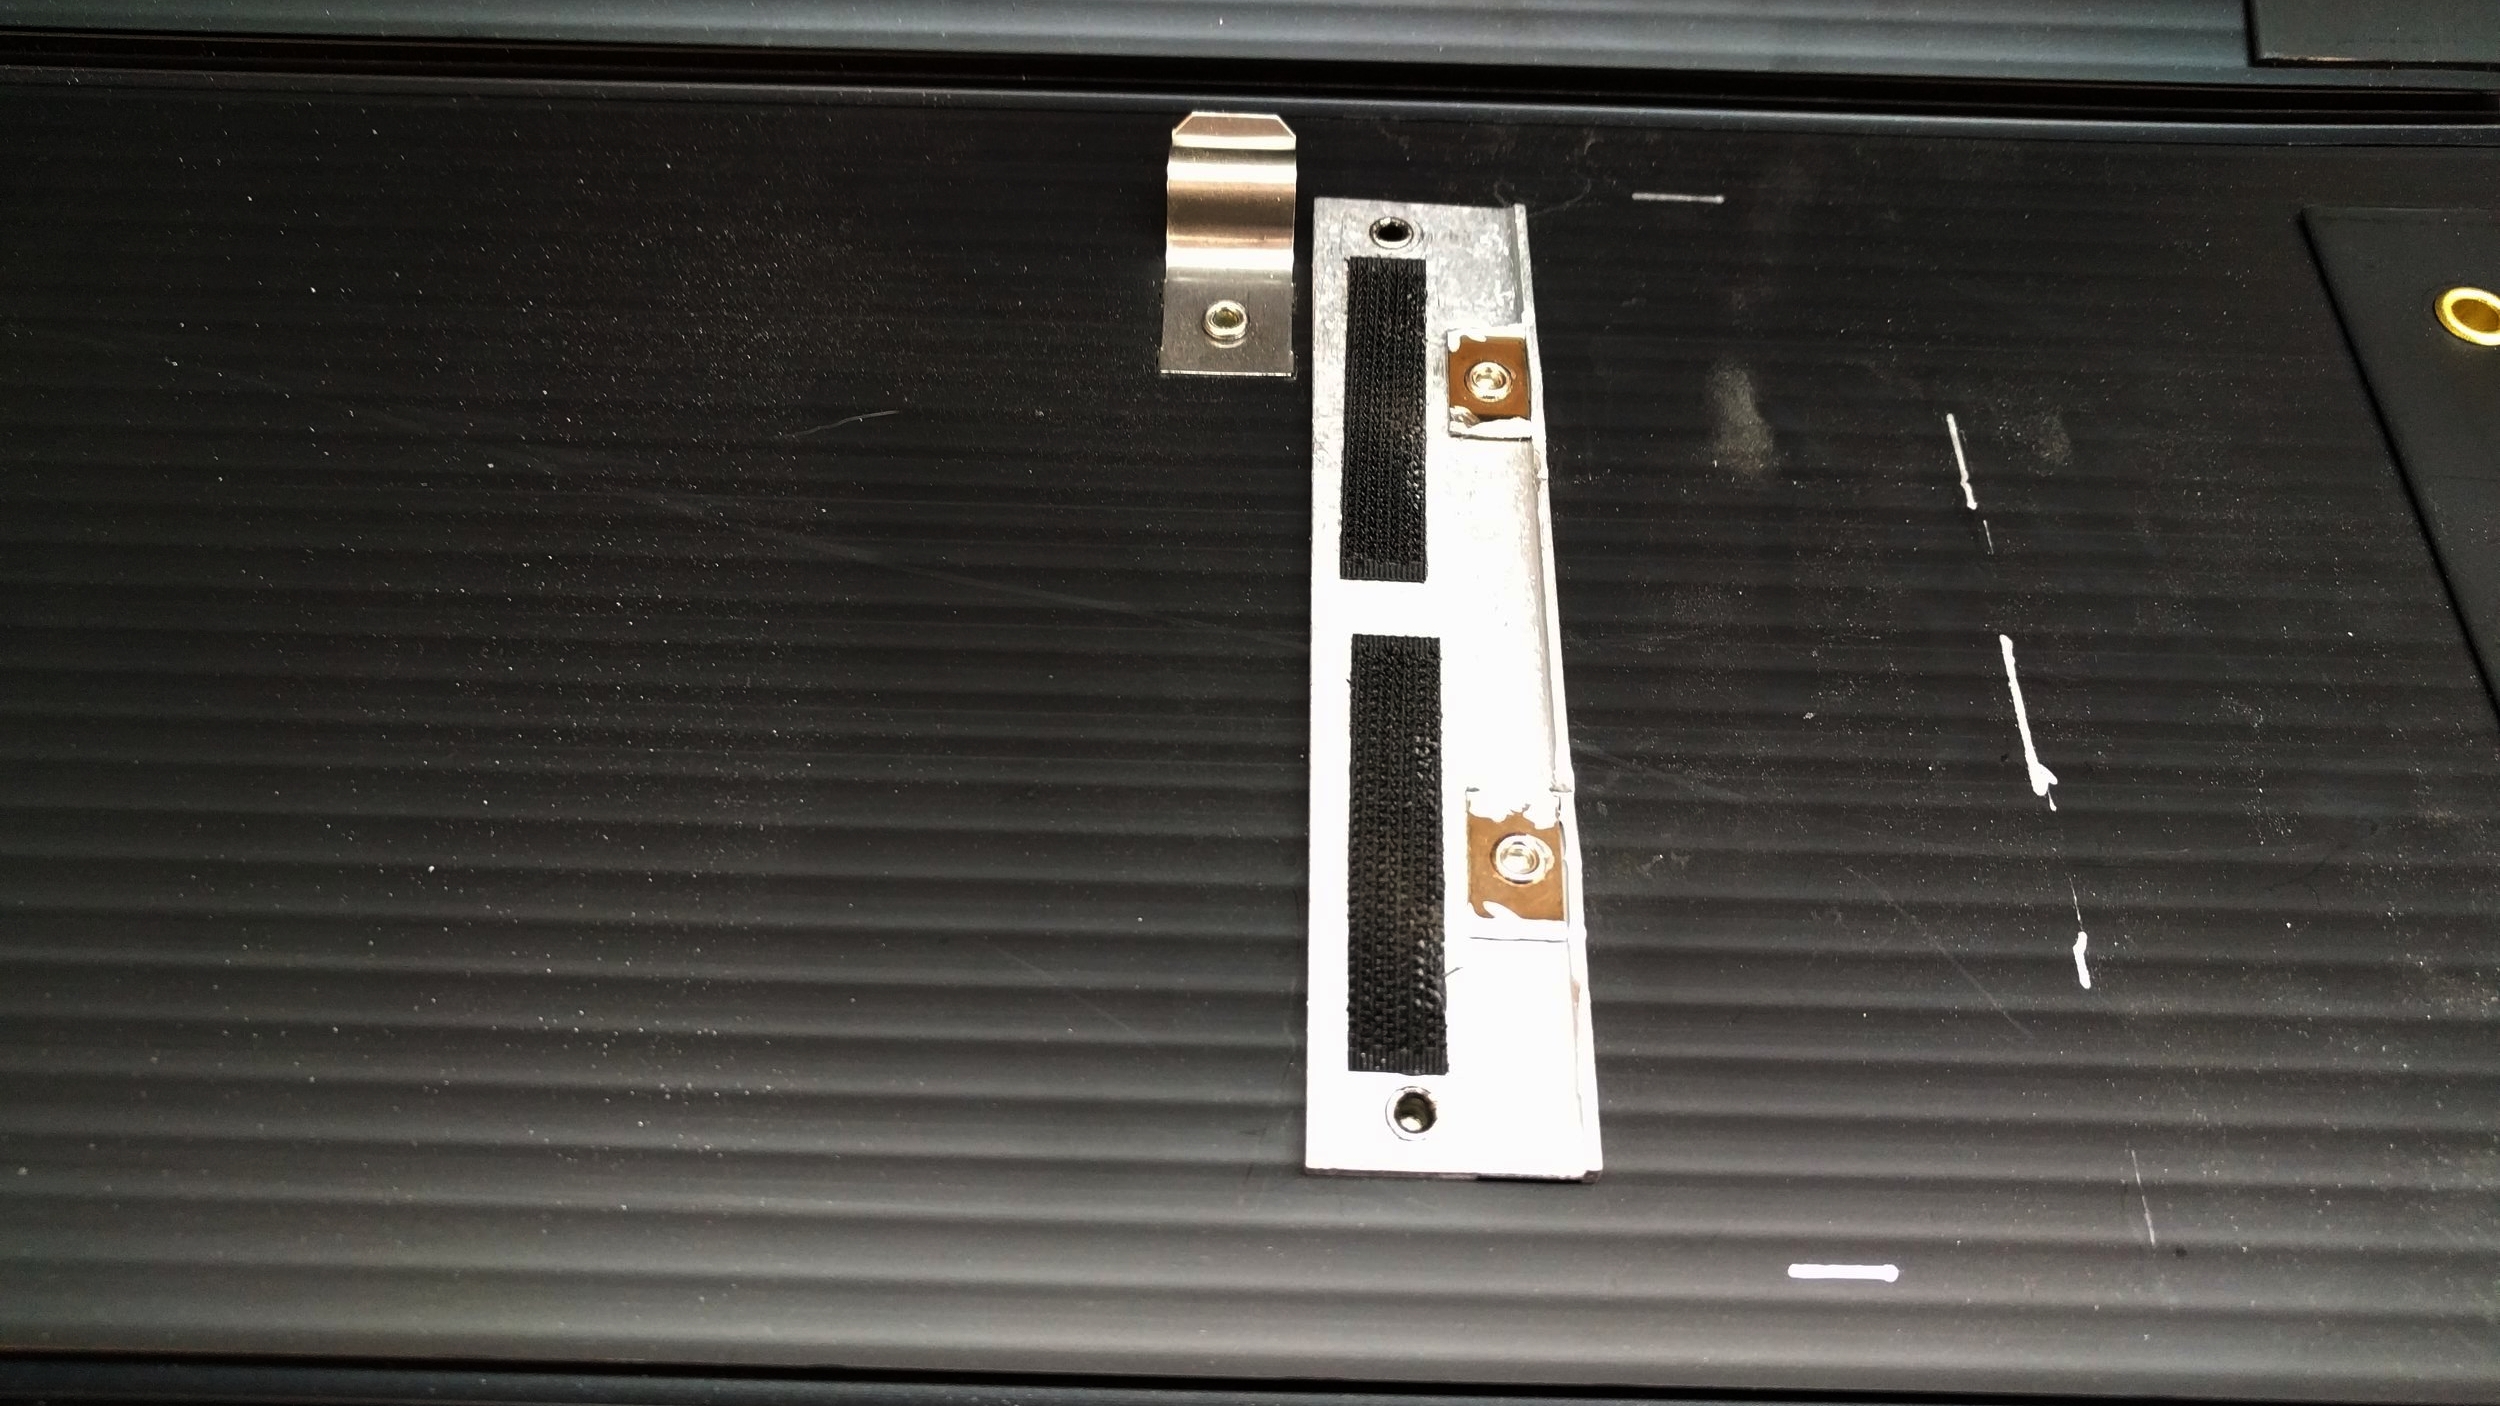
Mark all 4 sides of the Q-block with a sharpie and mark each of the holes.


Now it’s time to drill some holes! We drilled the holes slightly smaller than the screws themselves because we wanted them to fit snugly right off the bat.

This is the fun part. Start threading the screws through the fixture with the washer on the bottom.
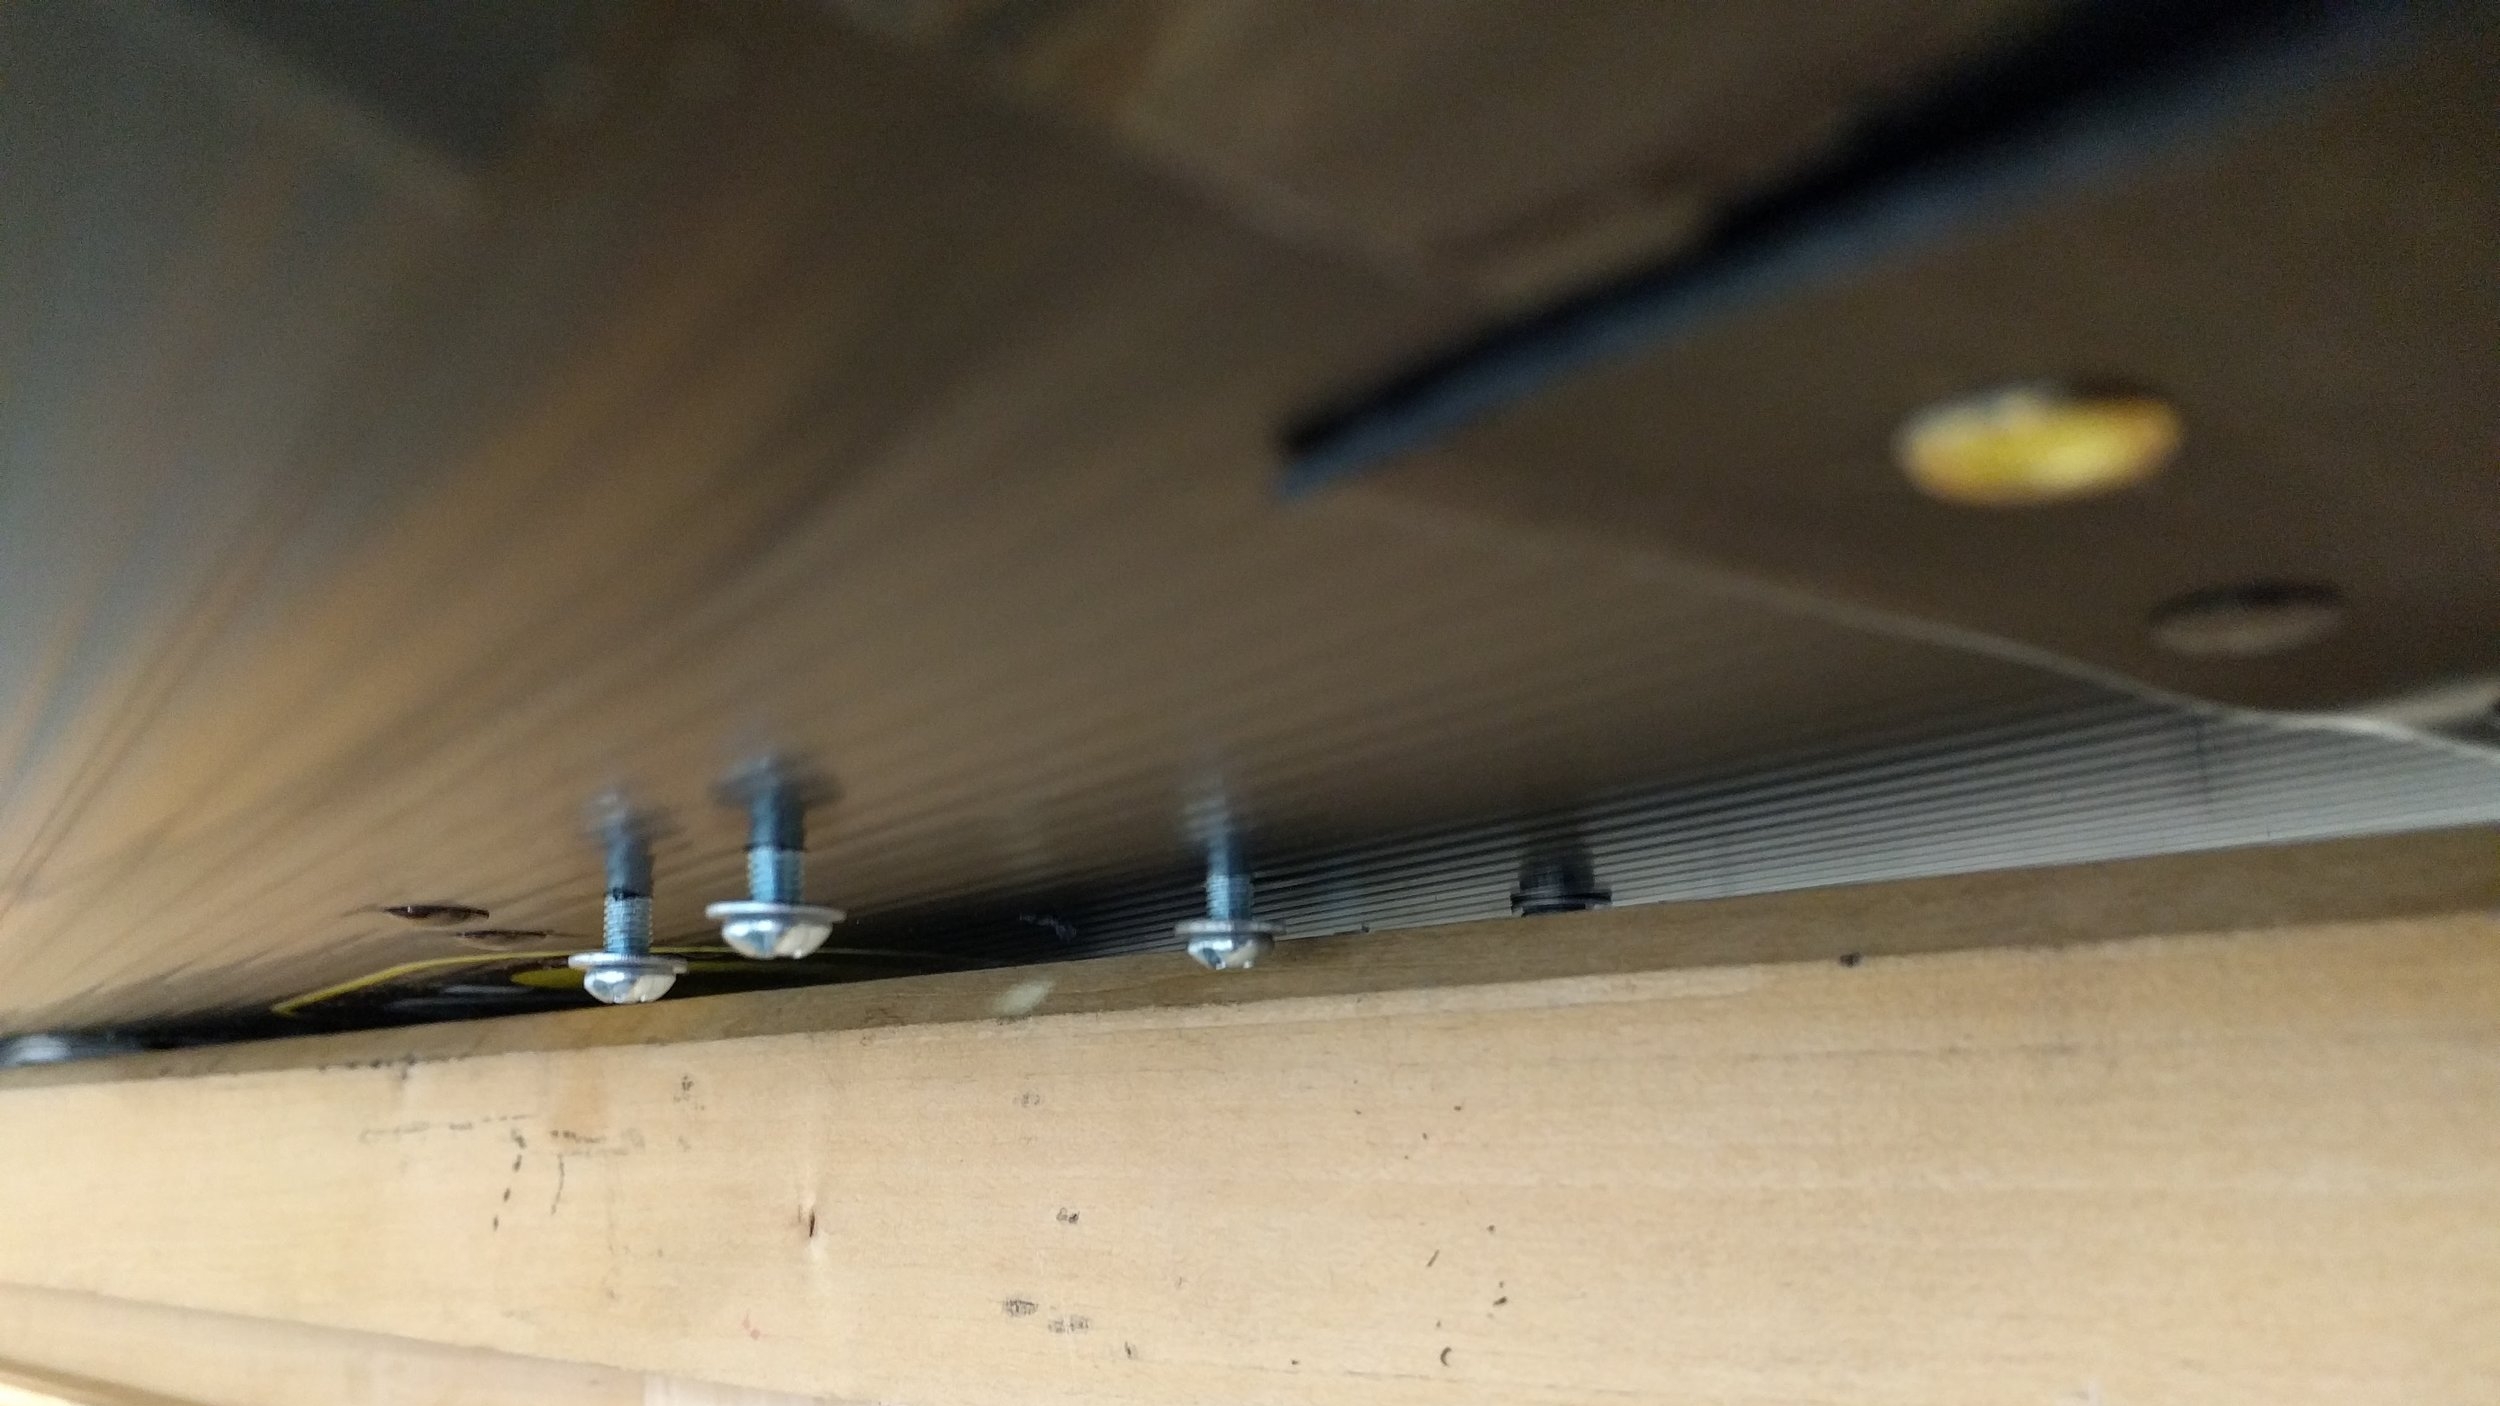

Once you've finished threading the screws, simply put the mounts on and tighten them. Insert your Quasar tubes and you’re done! Congratulations, you are now the proud owner of a retrofitted Kino!


Quasar sells cluster harnesses to power these on their website, but if you didn’t want to spend around $200 for that you could spend about $15 and make your own version. It’s not as pretty but it will get the job done. This is where the optional stuff comes in. Basically, you just need to get the lamp wire, attach the female and male ends, then clip Add-A-Taps near the female end wherever you want the connections to be. Because it’s a lamp wire, it doesn’t have a ground. Quasar sells the power connectors without grounds also.


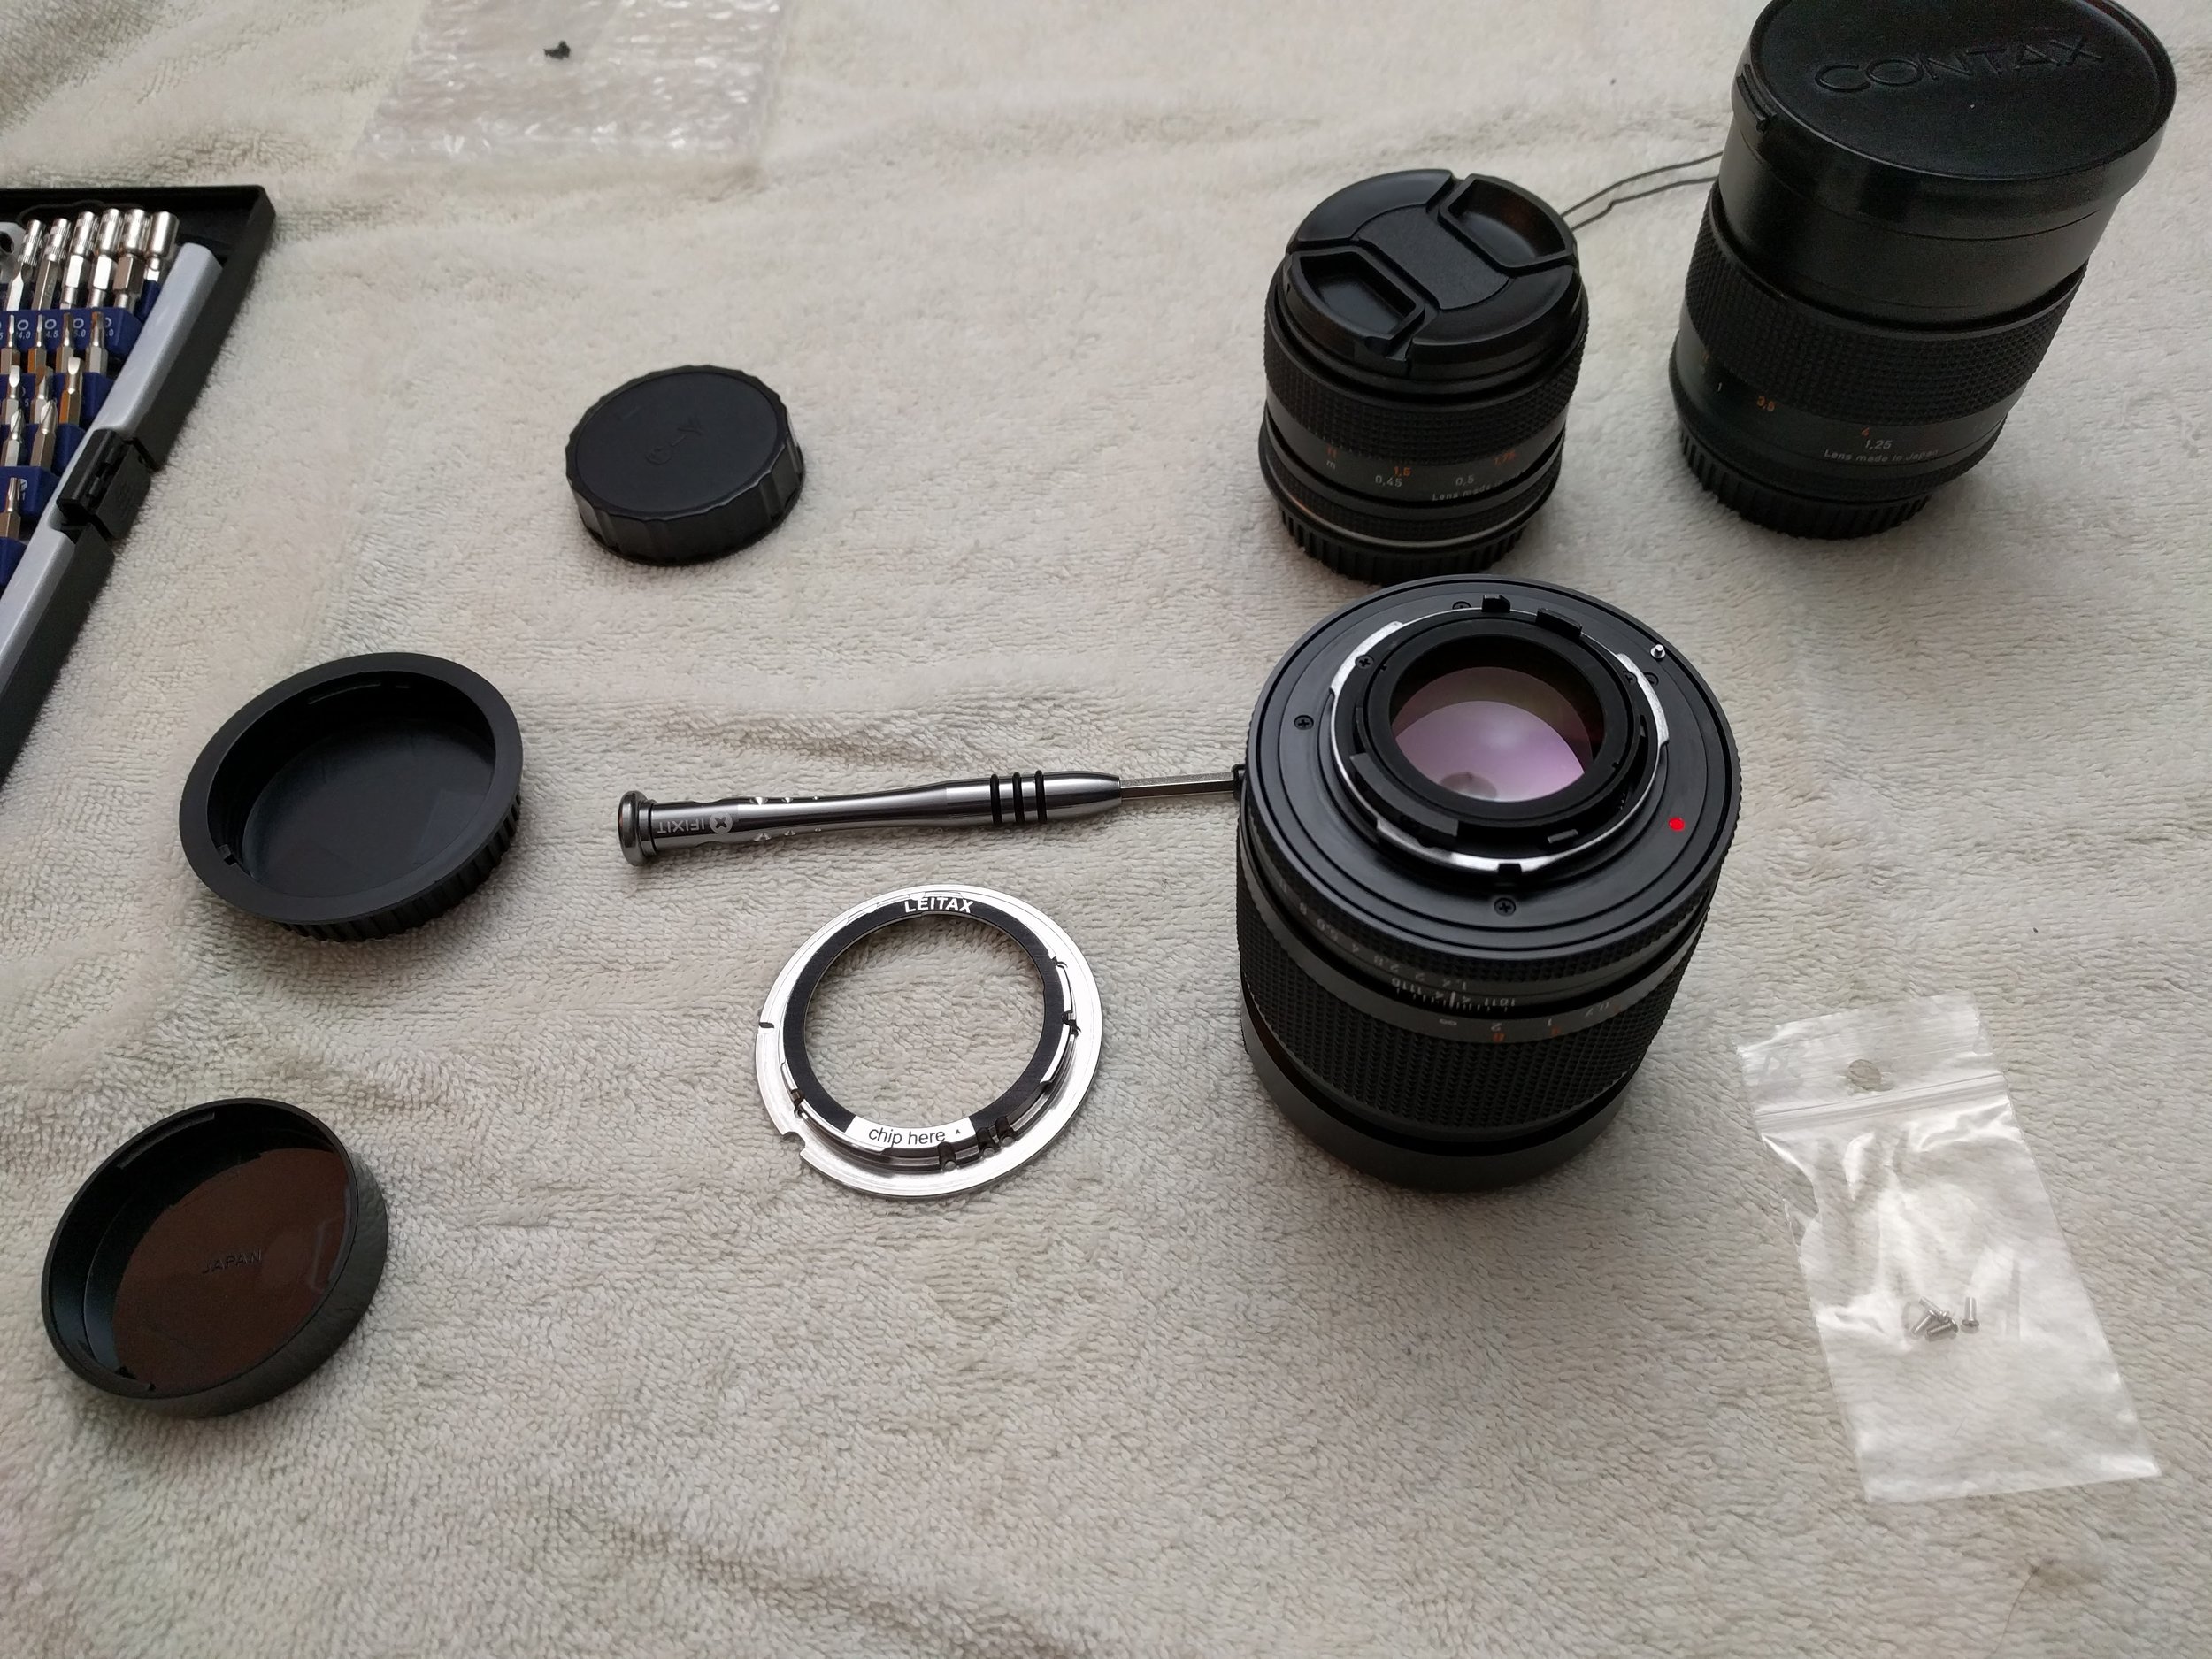
Cine-Modding Contax Zeiss lenses
If you're wanting to get some awesome lenses that wont break the bank while you save up for your PL lenses. Cine-modding some older glass could be just what you're looking for...
For a few weeks, I scoured antique stores and searched online for vintage Contax Zeiss lenses that would provide some more character to my set. Then, I decided to cine-mod them myself to save a few bucks, since I didn't care about de-clicking them. Hopefully, my experience (good and bad) will help you in your cine-modding endeavors.
Purchasing
When you begin looking for places to buy your new set of used lenses (I'm aware of the irony in that sentence), you're probably going to end up feeling pretty overwhelmed. Luckily, there is a great resource on reduser.net that can help you out. It's the most in-depth source of information you will find on these Contax Zeiss lenses.
Once you've done your research and know what you want, it's time to get buying. I purchased all of my lenses through eBay, but websites like keh.com may provide a better overall experience. When buying from eBay you will want to:
Inspect the Lens! The most important thing to note is that the listing say's, No Haze, No Fungus, and No Scratches. Dust in an old lens is perfectly fine and normal, but haze, fungus, and scratches will accumulate if the lenses were not cared for properly. Haze, in particular, is a tricky one to catch. The majority of ebay sellers don't actually know what haze is or how to look for it. Sellers will post photo's that look fine, but until you shine a strong light into the lens you won't know if it has haze. The glass in their photo's might look pristine but that doesn't mean its going to be under inspection. The first lens I received looked like this under a light.

It was like pulling teeth to get the return. The seller didn't speak English very well, so he thought listing the item "sold as is," meant "no returns" and if the item didn't match the description then too bad because it's "sold as is." This highlights the importance of what I mentioned before. Make sure the lens is listed as having "No Haze, Fungus, or Scratches" or you might find yourself stuck with a lens you're less than thrilled with.
The Cine-Mod
Now that you have gone through the most difficult process, it's time for the fun part. You've got all of the lenses in front of you and they're looking so fine! Problem is you can't mount them and they are essentially very pretty doorstops. You're going to need to change that and this is where Leitax.com comes to the rescue. Hands down, they sell the best permanent mounts on the market. Once fitted, you will feel like the lens were originally made that way. On the Leitax site, look for the Contax for Canon tab at the top. Pull up this list: Lens Adapters. This will help make sure you order the correct mounts. They ship from Spain, so you'll want to order all the adapters at the same time. I made the rookie mistake of having multiple shipments and the price added up fast. Also you will want to order them with the upgraded shipping option like he recommends, it's worth the extra few bucks.
Once the adapters show up, it's time to get your tools ready and jump in. Leitax also has PDF's explaining, with photo's, how to put on the adapters. The most helpful thing I found for this process was having a small magnetized screwdriver. Every screw is tiny on these lenses and having this screwdriver sped up the process. Also make sure the environment is prepared. I put up a flex light and set a towel on the table so if a screw fell it wouldn't roll away.
Now that you have you're adapters on you can finally put them on your camera of choice and test them out! But if you want to finish the Cine-Mod you will need to get some solid follow focus gears. You can purchase some cheap ones on Amazon that will get the job done, but if you want to make your new lens a cinema lens you will want a semi-permanent option.

I went with Cordvision follow focus gears since they offered custom molds and also sell 80mm front adapters for a variety of lenses. Although, Cordvision ships from outside of the USA, so be prepared for a wait. Out of this whole cine-modding process, attaching the gears was probably the most intimidating part. This is because custom fit gears will not fit onto the lenses right out of the box. They must be heated up first, and as they cool they will shrink onto the lens. This means you put them into the oven, they heat up, you take them out and have about 30 seconds to get them leveled onto the lens exactly where you want them before they are permanently mounted...no pressure, haha. Cordvision will send instructions with the rings.
Once you get through this process and the gears are on, you will be super happy with the results. They don't budge. I've tried them with wireless follow focuses and haven't had any issues; It's like the lenses were made for cinema. I would highly recommend Leitax and Cordvision if you're wanting to mod, although I'm sure there are some good alternatives out there.
Conclusion
If you are wanting to cine-mod for yourself to save some money, or because it's super fun, then I would say go for it! But if this all makes you a little too uncomfortable, I would say just send your lenses over to Duclos Lenses. They can do whatever type of Mod you need, including de-clicking the lens.

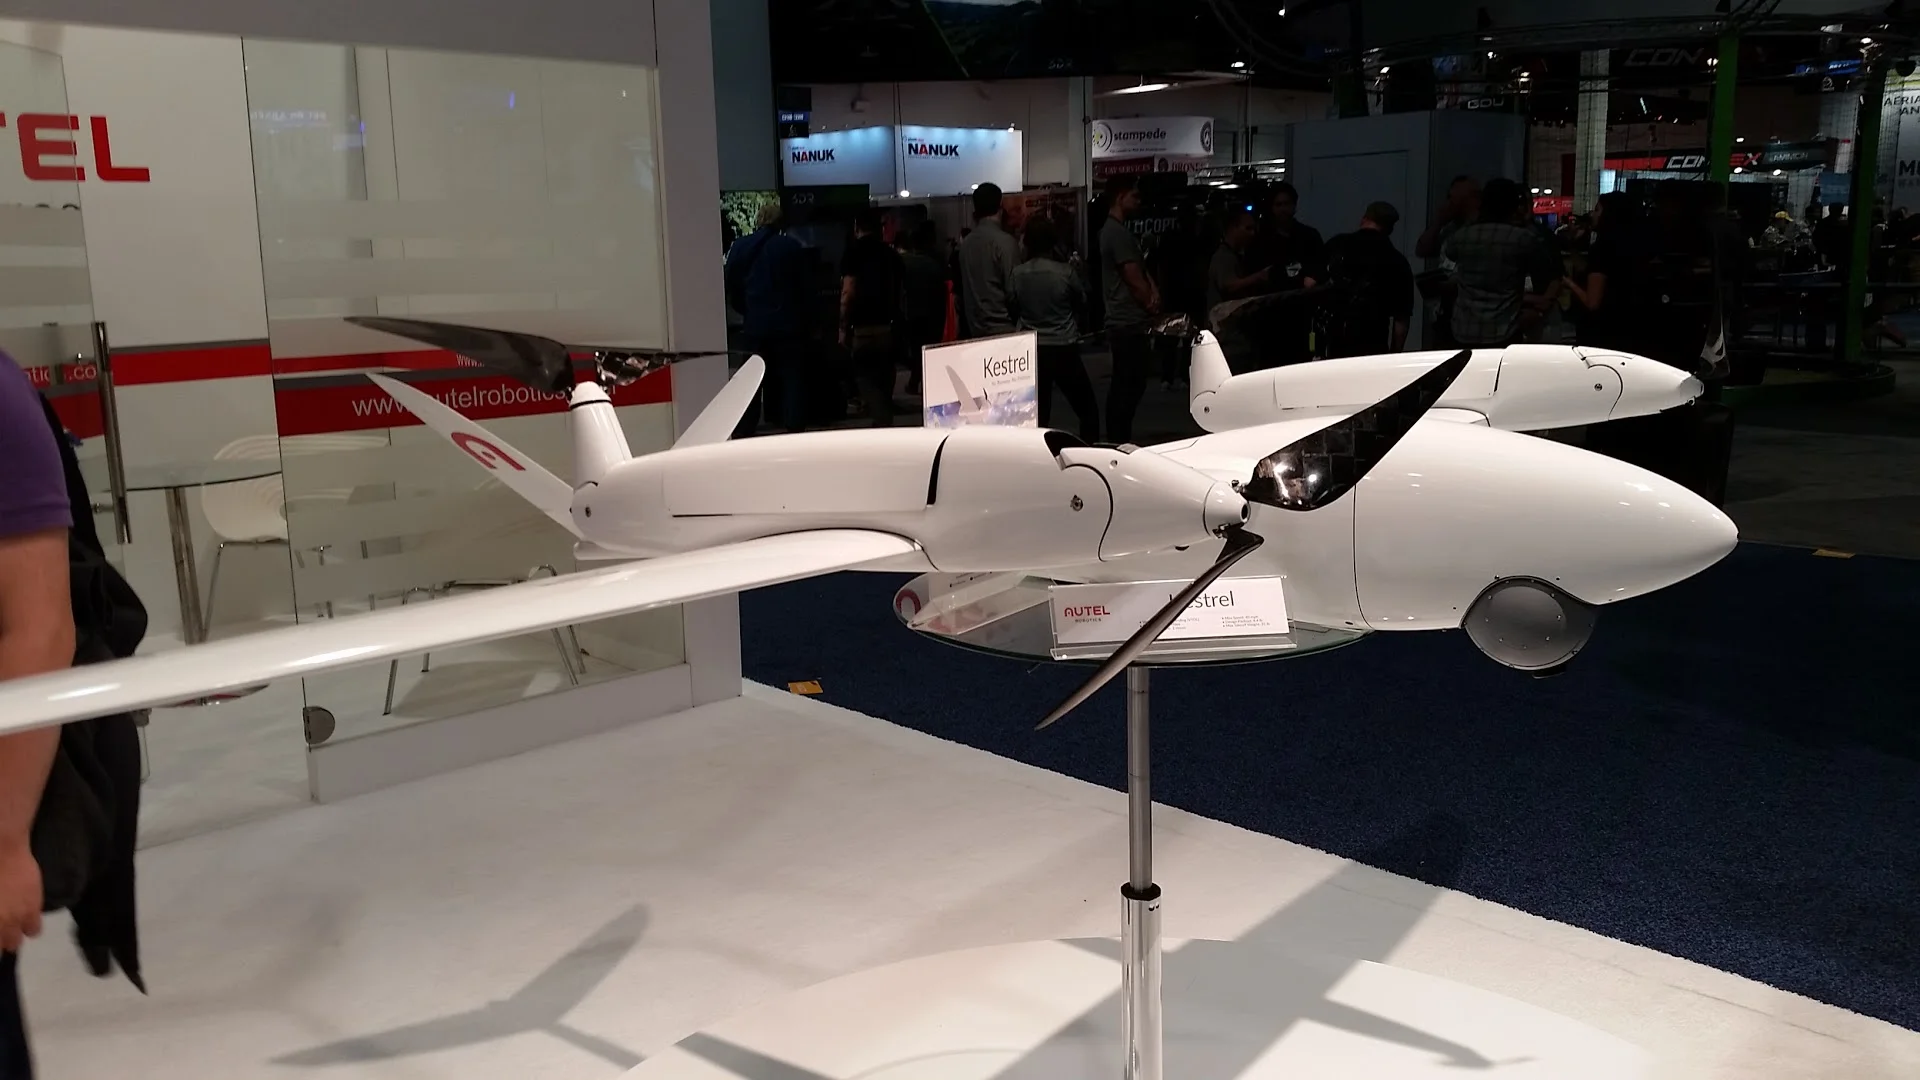
NAB 2016
This year I was able to make it out to NAB with Bed Head Media and gain some insight into the direction cinematography may be going. There were countless booths that seemed to never end, but a few things stood out more than most...
This year I was able to make it out to NAB with Bed Head Media and gain some insight into the direction cinematography may be going. There were countless booths that seemed to never end, but a few things stood out more than most...
LED's...The only lights you could find at the whole conference seemed to be LED's, which I love. A few years ago I was extremely cautious about LED technology because of the horrible color quality they put out. This year that was not the case. The main theme that I saw again and again was that almost every vendor was pitching how high of a TLCI (Previously CRI but the new version relates directly to video rendition) rating their lights had.
The reason this is such a huge deal is because the competition is driving the quality of LED's up and the price down. Mole Richardson even showcased a 10k LED Fresnel that could run off a regular 20 amp circuit, items like that are game changers. Another company to look out for is Aputure LED's. They put out LED lights with TLCI's of up to 98 at prices that are close to half the price of competitors, single handily forcing the bigger names to cut the cost's of theirs.
These were the most impressive things I saw on the lighting front, although I was only at NAB for one full day. The other thing that stood out to me was the sheer amount of drones that are available on the market now. One whole section at NAB was filled with netted areas that sounded like 1,000,000 bees were swarming the place. (Although the breeze it created in the musty conference center was appreciated.)